I've been slack of late with the blog writing, trying to to catch up on things like paid work (someone has to do it) and workshops. At any rate the end of February was also the second workshop in the Drakensberg with the African Impact photographers. Apart from one dud morning where the clouds hung so low that we were unable to shoot the dawn we had absolutely splendid shooting weather. Of course the low lying cloud lent itself to macro work with dew laden grasses and flowers, so even that wasn't a problem.
It seemed the workshop was something of a 'layering workshop' this time round, so here are a few example images with a brief explanation as to the rationale behind them.
Click through to continue reading....

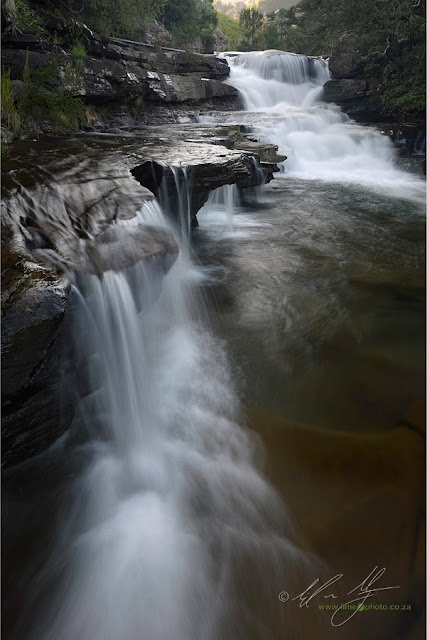
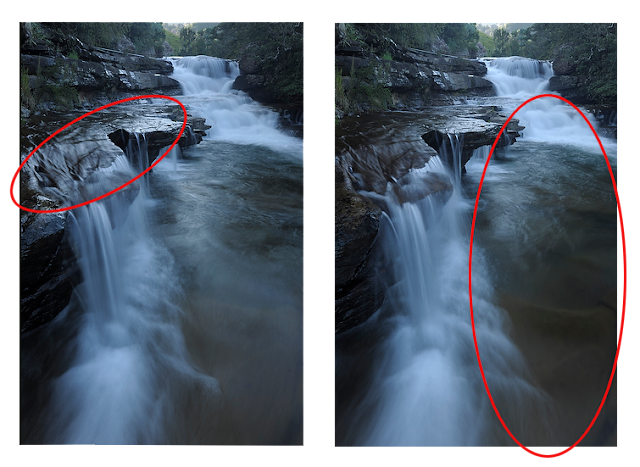
In the image of the cascading waterfall the idea was to show some of the depth and smoothness to the water while still retaining the shimmer of sky. Obviously, to cut through the reflections on the surface of the water a polarizer is needed. However, a polarizer doesn't selectively cut through reflections, it cuts through everything. The solution is to create two images - one where the polarizer is adjusted to cut through the reflections, the other where it allows reflections to remain. It is then a relatively simple task to blend the two images together in Photoshop using layers and masks. The image below indicates the areas of importance in the red marque hoops (click on the marquee'd images to enlarge).
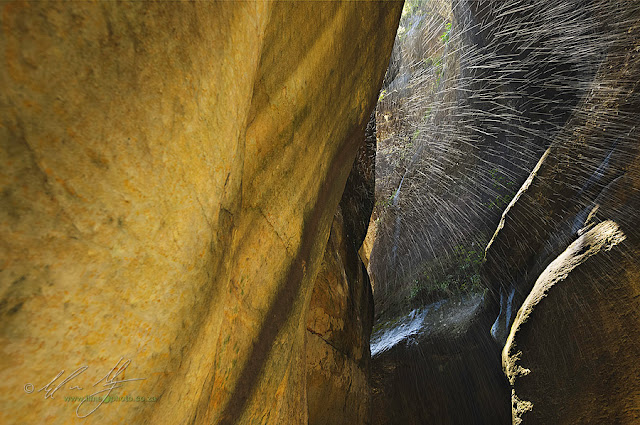
The shot of the water droplets flying through the air was a little more complicated as it required a few more exposure brackets (whereas the waterfall shot was the same exposure - i.e shutter speed and aperture) in both images. Here I watched the histogram carefully to make sure that I had sufficient details in the shadow and highlight portions of the FINAL image.

What this means is that at least one of the images would not clip in the shadows while at least one other would not clip in the highlights. The rest of the images would be a series in between these two extreme exposures for shadow and highlight detail (see below). One option is then to bring the images into a programme like Nik HDR Efex Pro or Photomatix Pro, but I have found that moving subjects like this tend to work better when blended manually with simple masking tools (like the marquee, lasso and polygonal lasso tool).

The most important criteria to get this right is of course to be able to effectively pre-visualise the image in the first place. This isn't always as hard as it sounds. The shot in the sandstone tunnel ended up looking pretty much like it was to the human eye. The problem was more that the camera couldn't capture that level of tonal change in a single exposure. Know the limitations of the camera, figure out the technical 'layers' that need to be photographed and then expose for them accordingly.
Overall it was a fantastic weekend in the mountains. Sadly there was a fatality though. One Sony A35 ended up drowning near the entrance to Rainbow Gorge. No fault of the camera nor the photographer - just bad luck and a slippery stone. Thanks to a wonderful group! I had a ton of fun with you lot!

No comments:
Post a Comment